Overview
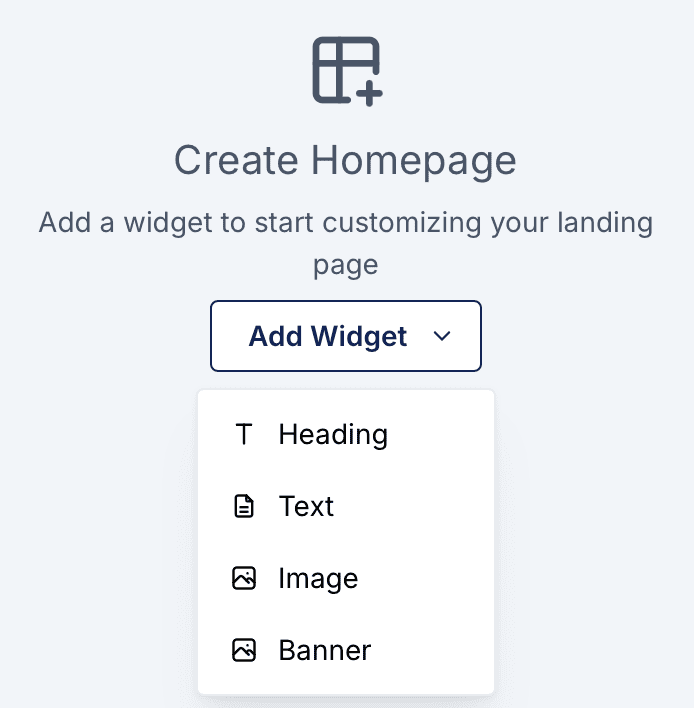
Widgets are customizable elements used to create and personalize your landing pages on the Sabasi Dashboard. Each widget serves a unique purpose, allowing you to add headings, text, images, or banners to your homepage.
1. Heading Widget
Overview
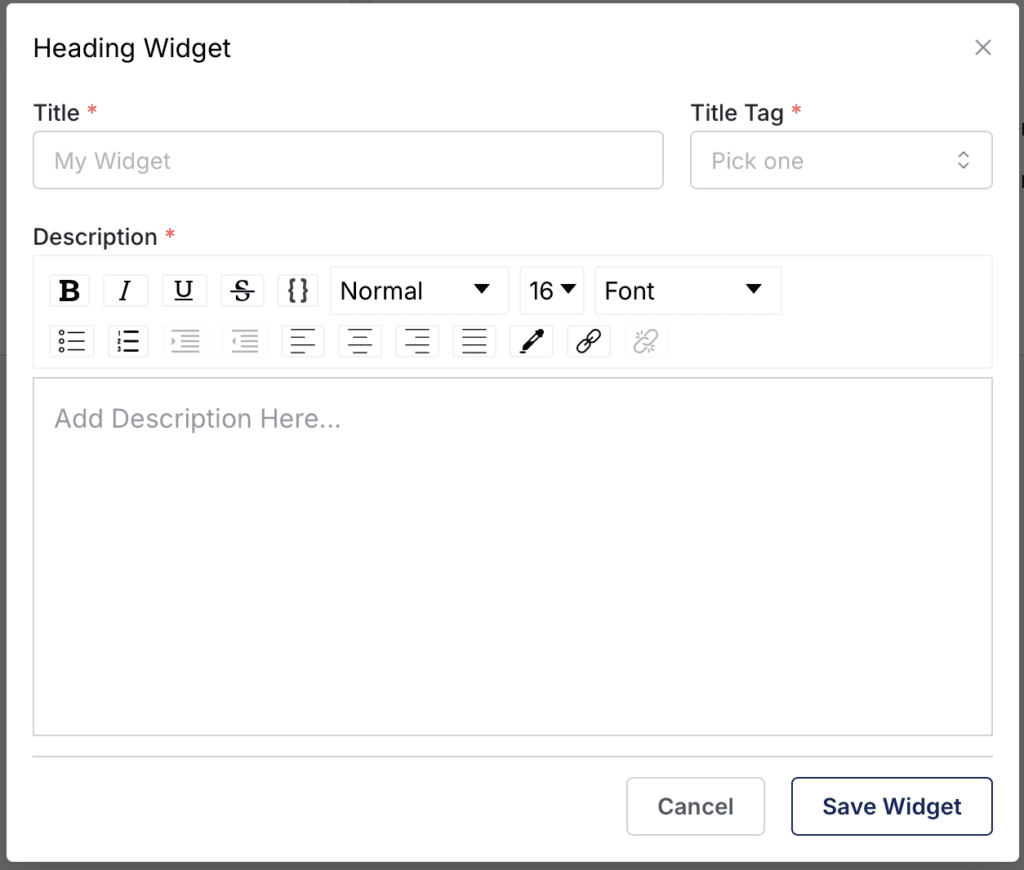
The Heading Widget allows you to add titles and headings to structure your homepage. You can customize the title tag (e.g., H1, H2) to emphasize its importance.
How to Use
- Select Heading from the widget options in the Add Widget menu.
- Fill in the following details:
- Title: Enter the heading text (e.g., “Health Dashboard”).
- Title Tag: Choose the title tag (e.g., H1 for the main title, H2 for subtitles).
- Description: Optionally add supporting text or explanations under the heading.
- Click Save Widget to add it to your homepage.
Example Use Case
- Add a prominent title to indicate the purpose of your homepage (e.g., “Welcome to the Analytics Dashboard”).
2. Text Widget
Overview
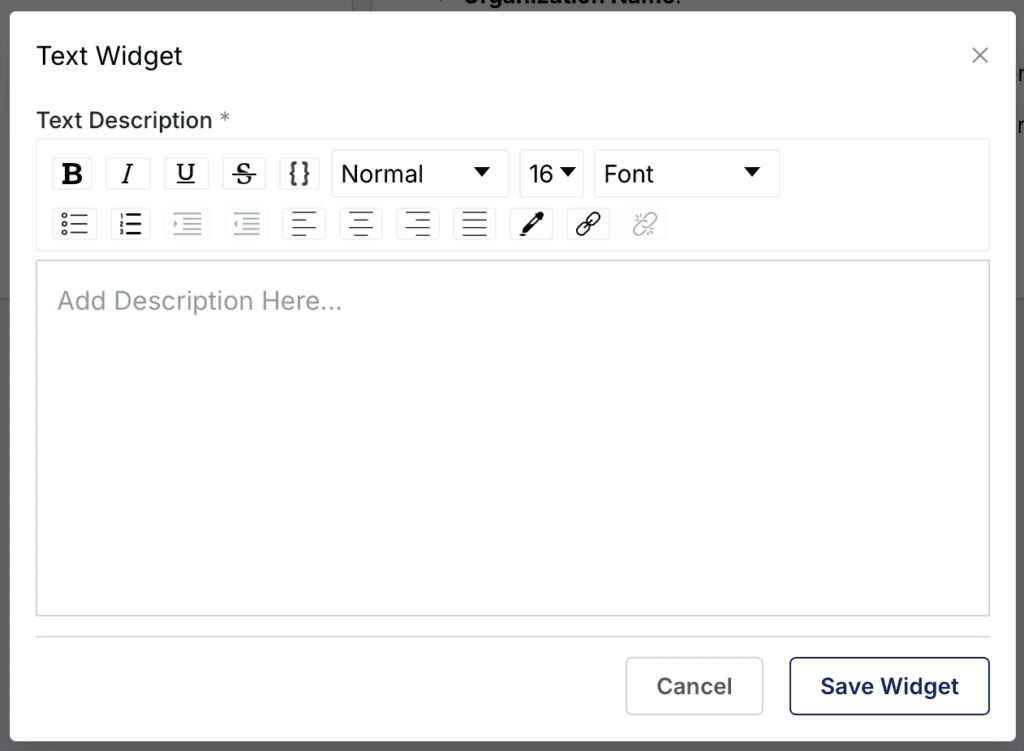
The Text Widget allows you to provide detailed explanations, descriptions, or instructions. You can format the text using the rich text editor.
How to Use
- Select Text from the widget options in the Add Widget menu.
- Fill in the Text Description field:
- Enter the content you want to display.
- Use the toolbar to adjust text size, style (e.g., bold, italic), alignment, and add links.
- Click Save Widget to add it to your homepage.
Example Use Case
- Add a section explaining a project or providing instructions for team members.
3. Image Widget
Overview
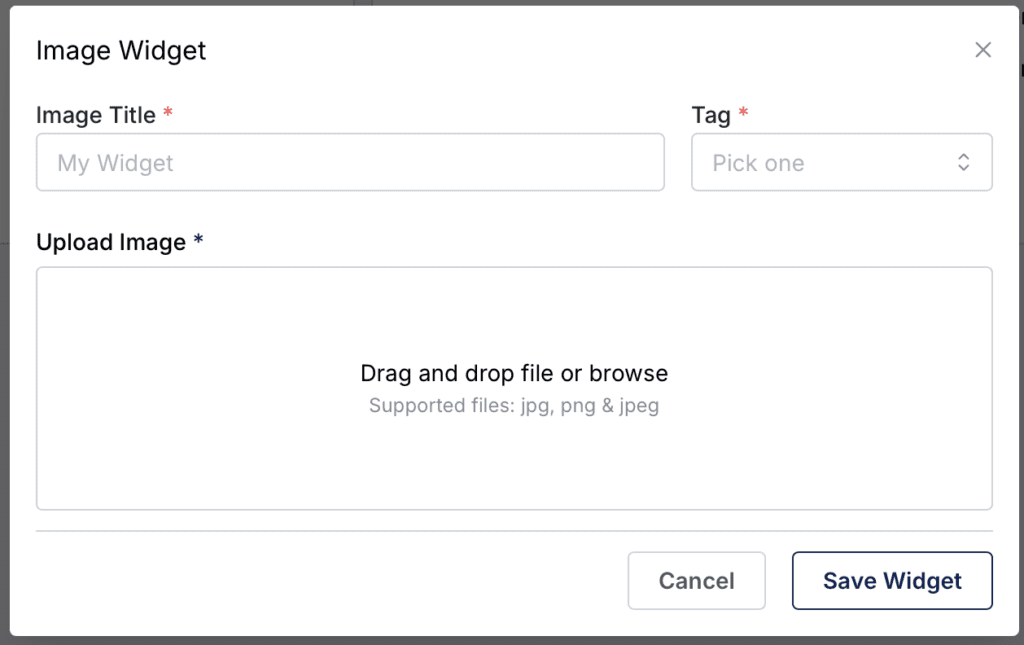
The Image Widget allows you to upload and display visual content, such as logos, charts, or photos, to enhance your homepage.
How to Use
- Select Image from the widget options in the Add Widget menu.
- Fill in the following details:
- Image Title: Provide a title for the image (e.g., “Company Logo”).
- Tag: Select a tag to categorize the image.
- Upload Image: Drag and drop the file or browse to upload it. Supported formats are JPG, PNG, and JPEG.
- Click Save Widget to add the image to your homepage.
Example Use Case
- Display your organization’s logo or a chart summarizing key data.
4. Banner Widget
Overview
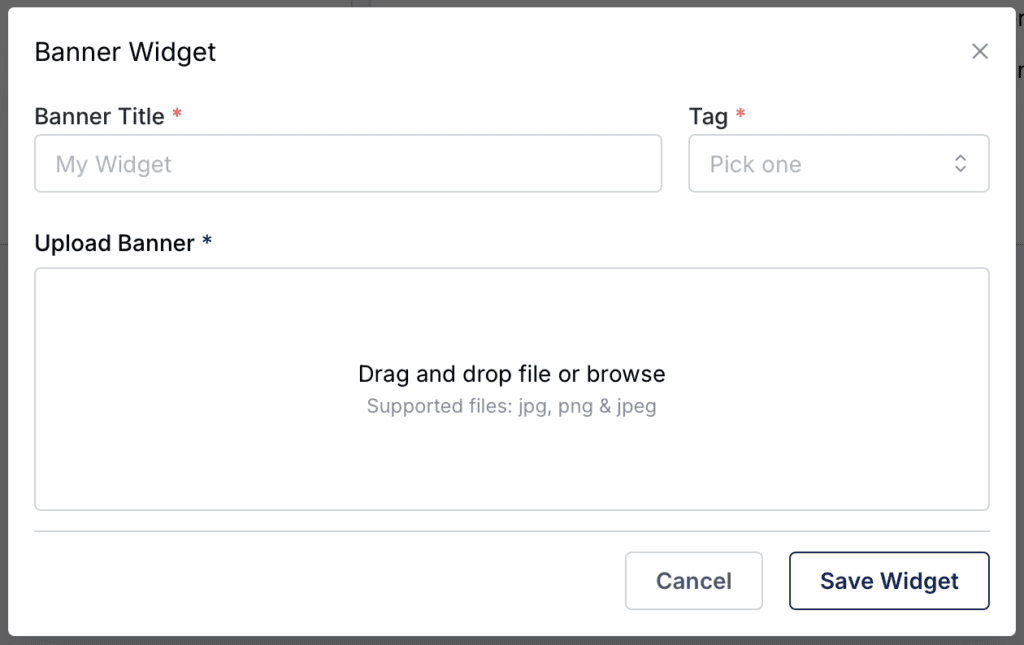
The Banner Widget is used to highlight key announcements or updates on your homepage. It supports visually engaging content to grab user attention.
How to Use
- Select Banner from the widget options in the Add Widget menu.
- Fill in the following details:
- Banner Title: Provide a title for the banner (e.g., “Upcoming Meeting”).
- Tag: Select a tag to categorize the banner.
- Upload Banner: Drag and drop the file or browse to upload it. Supported formats are JPG, PNG, and JPEG.
- Click Save Widget to add the banner to your homepage.
Example Use Case
- Announce an event or highlight an important update.
Managing and Editing Widgets
Reordering Widgets
- Drag and drop widgets on the homepage to rearrange their position.
- Place them in the order that best suits your design and layout needs.
Editing Widgets
- Click the pencil icon on an existing widget to modify its content or settings.
- Make your changes and click Save Changes to update.
Deleting Widgets
- Click the three-dot menu on a widget and select Delete to remove it from your homepage.
Troubleshooting
1. Widget Not Saving
- Ensure all required fields (e.g., Title, Description, Image) are filled.
- Check your internet connection and try again.
2. Image or Banner Upload Fails
- Confirm the file format and size meet the requirements (JPG, PNG, JPEG).
- Refresh the page and retry the upload.
3. Widgets Overlapping
- Drag and drop the widgets to realign them.
- Ensure adequate spacing between widgets for better visibility.
Is there a limit to the number of widgets I can add?
No, but adding too many widgets may affect the page’s performance and layout.
Can I edit a widget after saving it?
Yes, click the pencil icon on the widget to modify its settings or content.
What should I do if a widget is not displaying correctly?
Refresh the page or check your layout to ensure proper alignment. If the issue persists, contact Sabasi support.