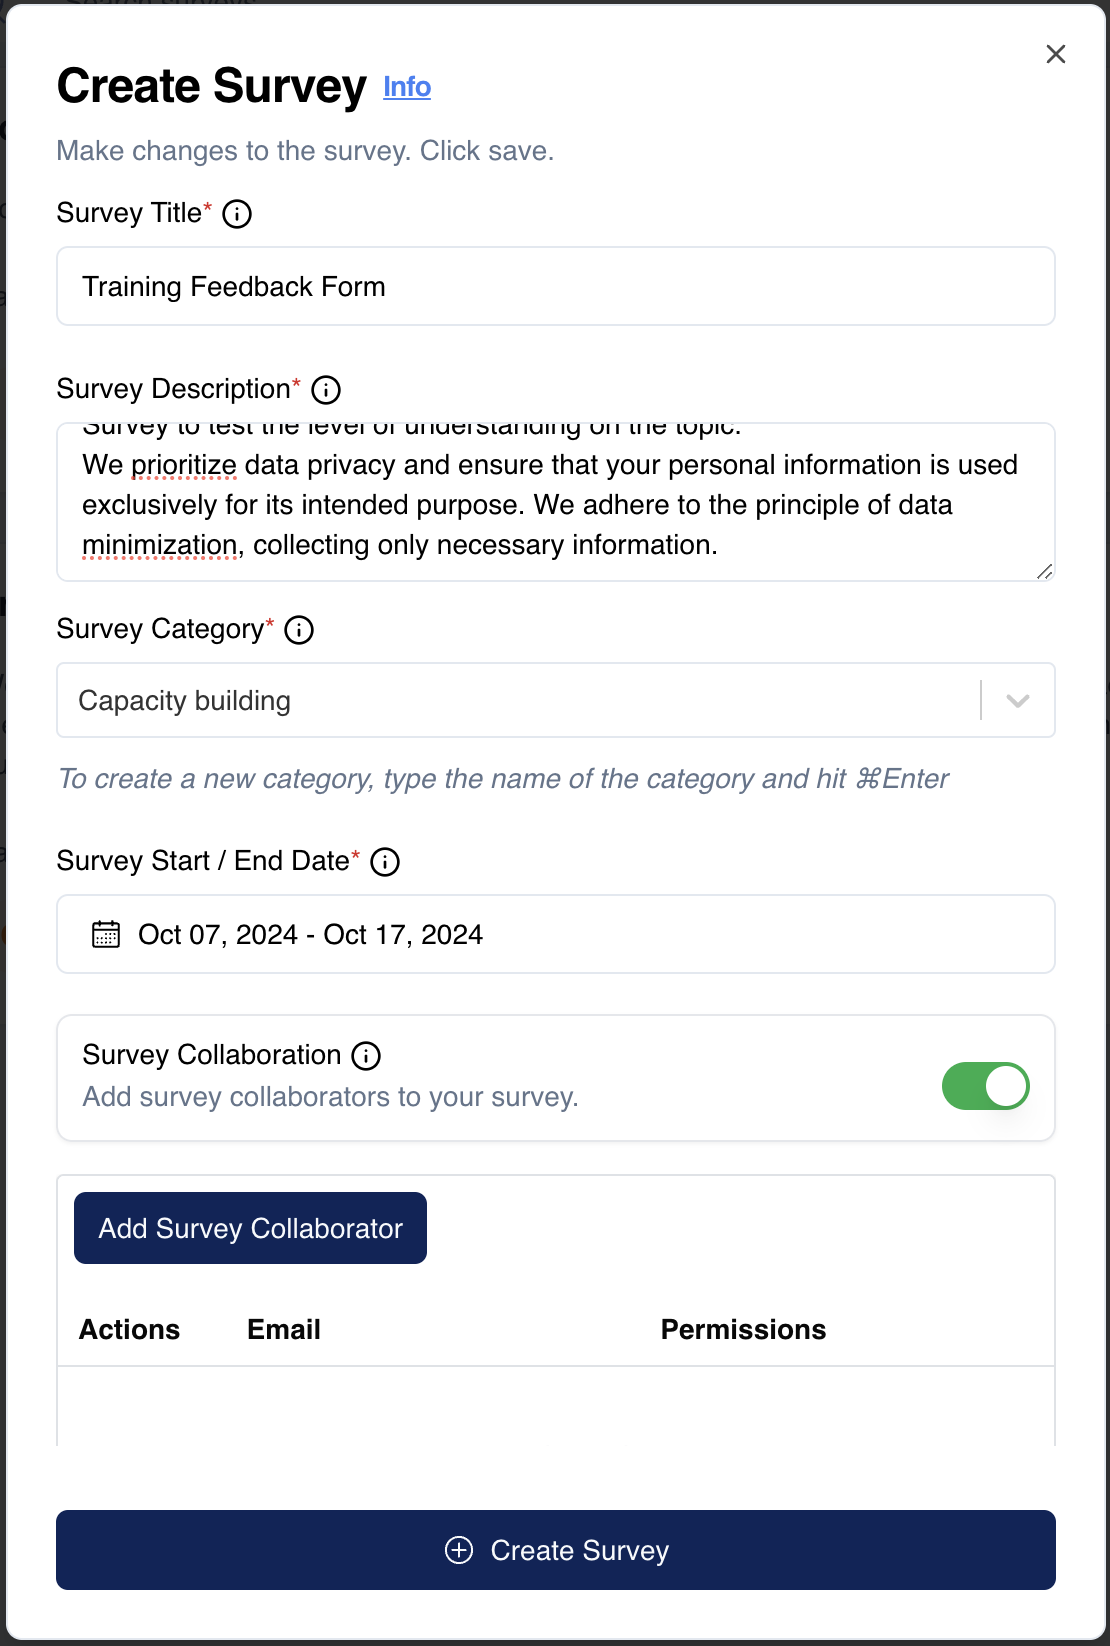
The Create Survey feature allows users to initiate a new survey by entering basic details and configuring its settings before launching it. This is where the foundation of the survey is set up, ensuring that it aligns with the intended purpose and scope.
Fields in Create Survey
- Survey Title: The title of the survey, which will be visible to respondents and administrators. This should clearly represent the topic or focus of the survey.
- Survey Description: A brief explanation of the survey’s purpose and what participants can expect. This is an important field to guide respondents on the nature of the survey.
- Survey Category: This dropdown allows you to classify the survey based on predefined categories such as education, feedback, or community services. Users can also create new categories by typing in a custom name, which helps in better organizing and filtering surveys within the organization.
- Survey Start/End Date: Select the date range during which the survey will be active. This ensures that the survey is only available for responses within the specified timeframe, after which it will automatically close.
- Survey Collaboration: This option allows the user to add collaborators to the survey. Collaborators will have permission to view, modify, or manage the survey responses, depending on the role they’re assigned. It enhances teamwork and collective input on surveys.
Process to Create a Survey
- How to Use:
- Survey Title: Enter the title of the survey in the “Survey Title” field. This title will be visible to participants and should clearly represent the survey topic.
- Survey Description: Provide a description that gives participants context about the survey. Include important details like the survey’s purpose or any specific instructions.
- Survey Category: Choose a relevant category from the dropdown menu, or create a new category by typing its name and pressing “Enter.” Categories help organize surveys within the system.
- Survey Start/End Date: Set the start and end date for the survey. These dates determine when the survey will be available for participants to fill out. The survey will automatically become unavailable after the end date.
- Survey Collaboration: Toggle the “Survey Collaboration” option if you’d like to add collaborators to your survey. Collaborators can help manage and modify the survey.
- Create Survey: After filling in all the necessary fields, click the “Create Survey” button to save the survey and move to the next step, which typically involves adding questions and customizing settings.
- Related Features:
- Survey Editor: After creating the survey, proceed to the survey editor where you can add questions and set up other features such as response options and visibility settings.
- Survey Categories: Learn how categories can help manage and filter surveys, especially when organizing many surveys within the system.
- Survey Collaboration: Understand the roles and permissions available for collaborators to manage survey creation and participation effectively.
Tips for Creating a Survey
- Be clear with the title and description: Ensure that respondents can easily understand the focus of the survey just from reading the title and description.
- Set appropriate timeframes: Choose a start and end date that gives respondents enough time to complete the survey but ensures responses are timely and relevant.
- Use categories wisely: Categorizing your surveys makes it easier to manage and find them later, especially when dealing with multiple surveys.
Create survey FAQ
What happens if I forget to add a collaborator?
You can add collaborators after the survey is created by editing the survey settings and selecting the Survey Collaboration option.
Can I extend the end date of the survey after it has been published?
Yes, the end date can be extended or shortened at any time as long as the survey is still active.
What if I don't see the category I need?
You can create a new category by typing it into the Survey Category field, and it will be saved for future use.