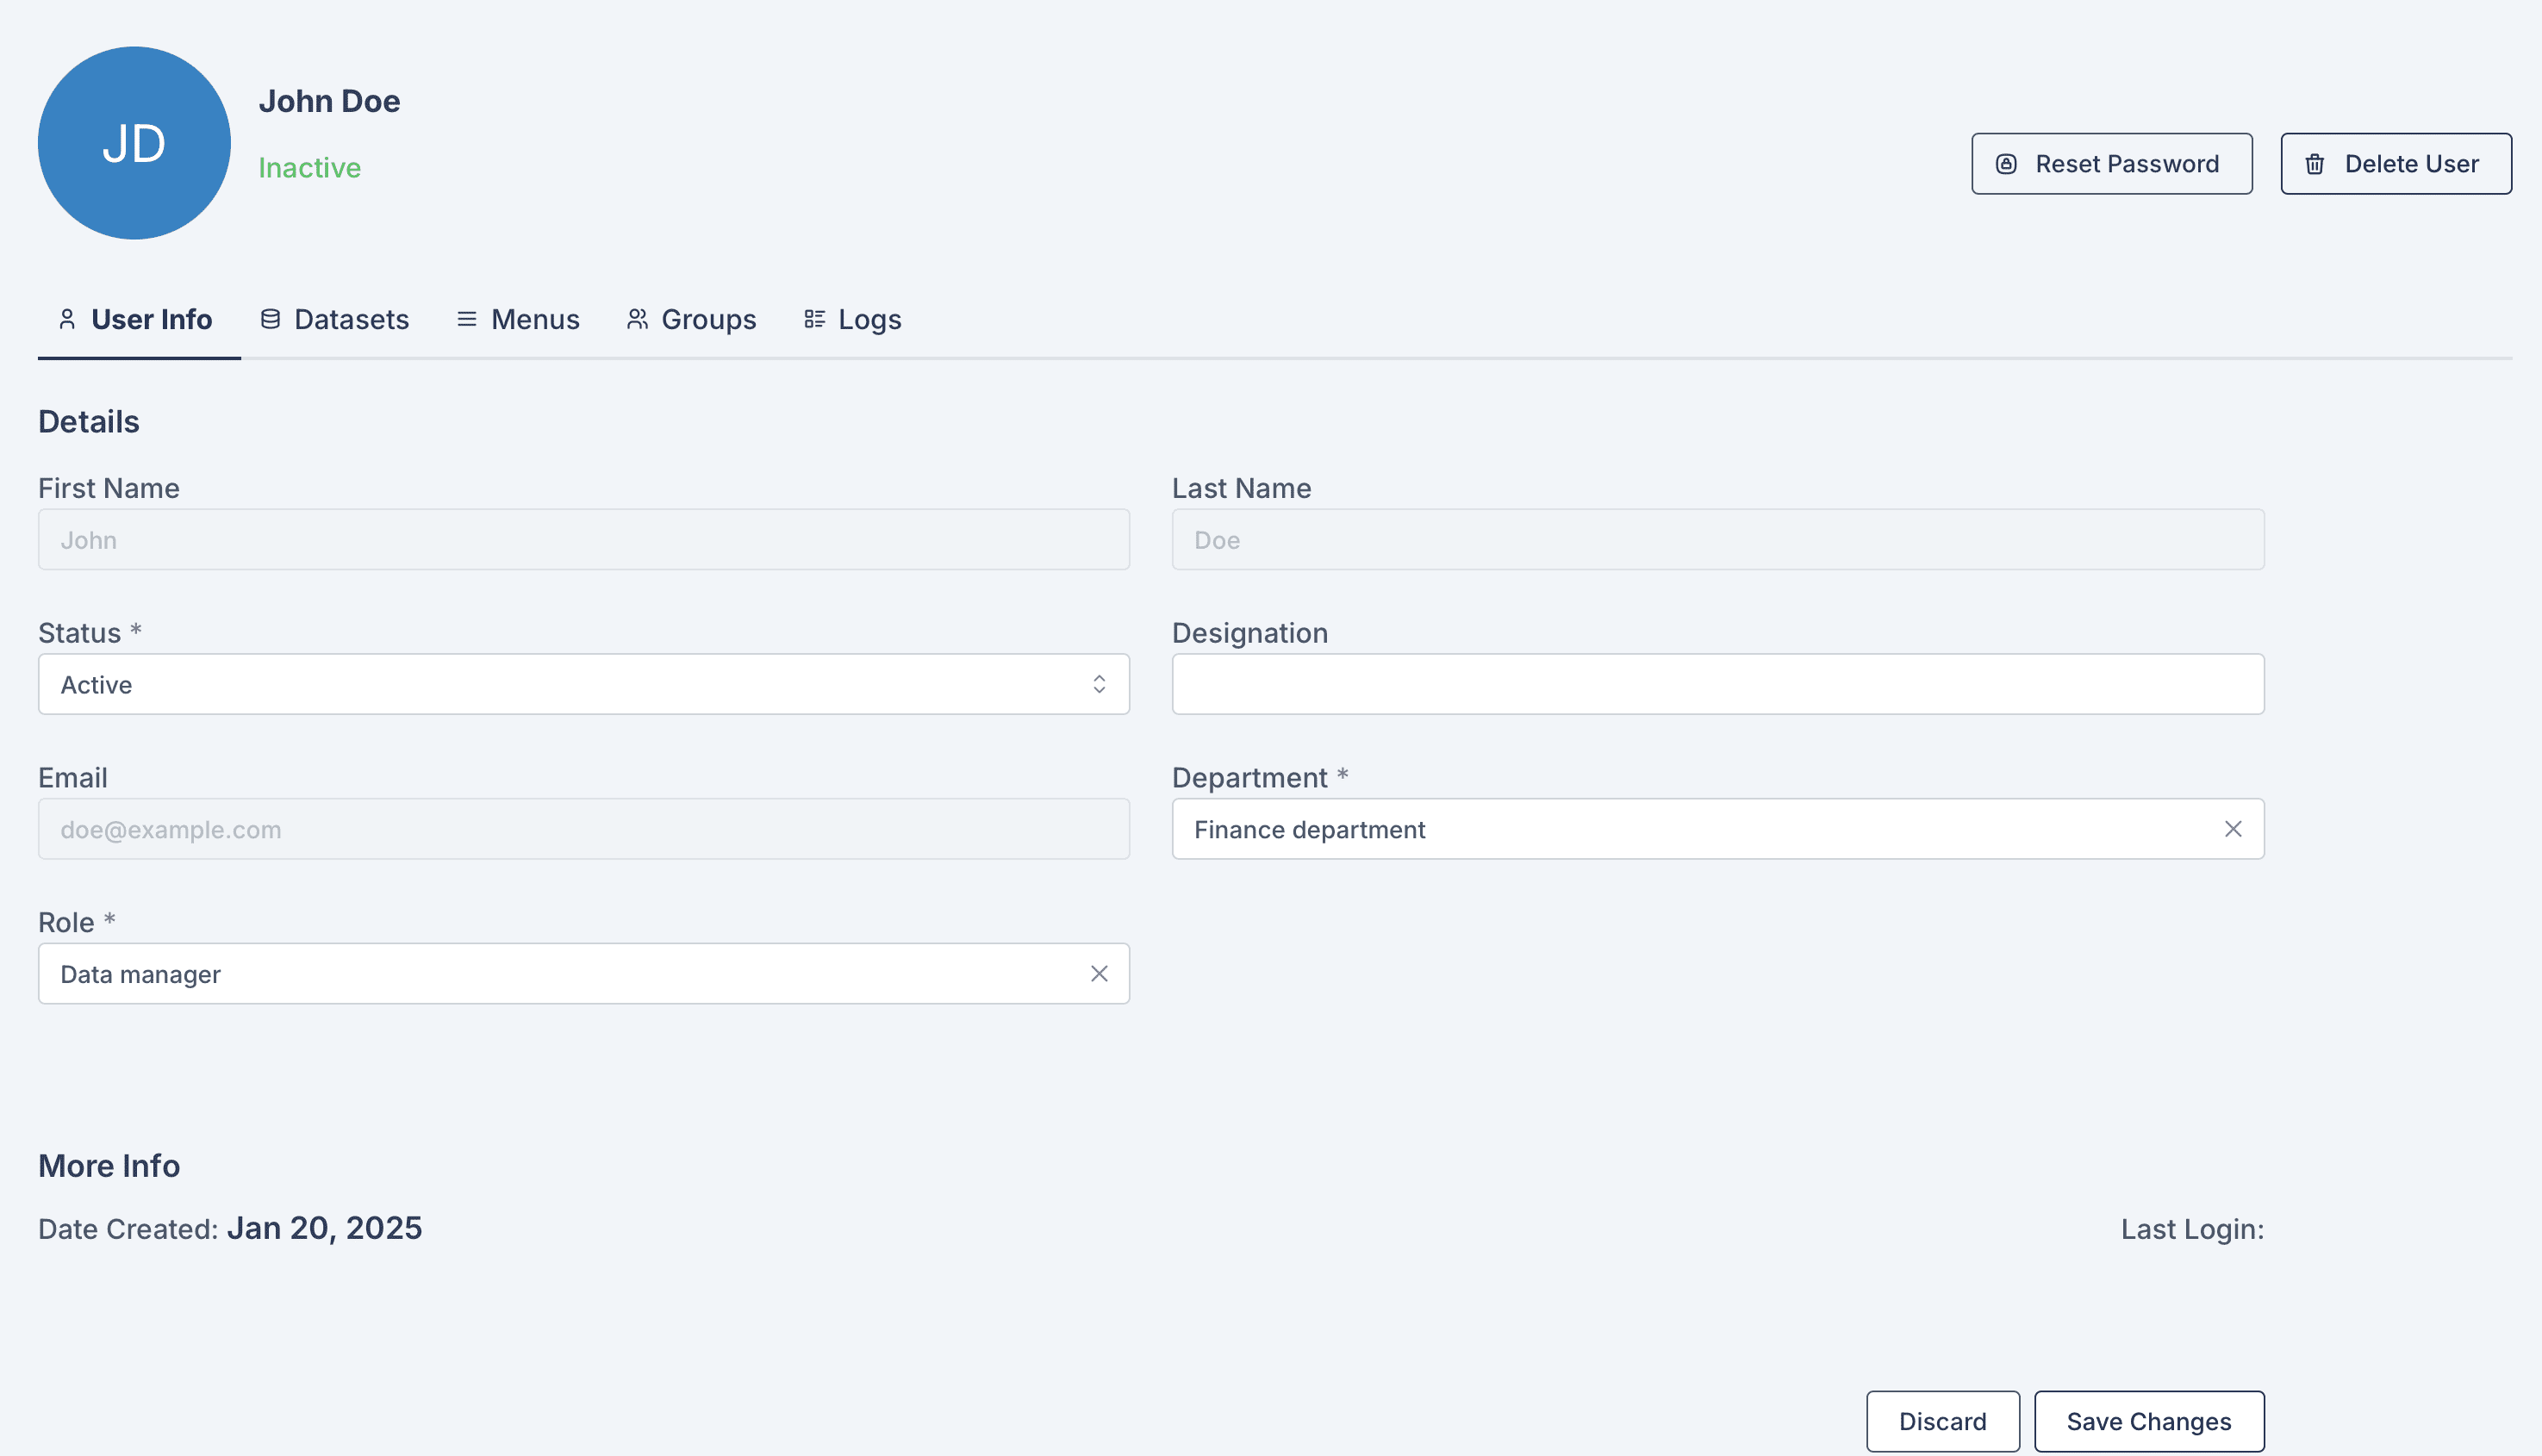
The Manage User section in the Sabasi Dashboard allows administrators to view, edit, and manage individual user details. It is divided into five key tabs:
1. User Info Tab
Purpose:
The User Info tab provides an overview of the user’s basic information and allows administrators to update user details, status, and roles.
Fields and Actions:
- First Name and Last Name: Displays the user’s registered name. (Non-editable)
- Status:
- Indicates whether the user is Active or Inactive.
- You can change the status from inactive to active.
- Email: The user’s email address (Non-editable).
- Designation: Add or update the user’s job title or designation.
- Department:
- Assign the user to a specific department.
- Users can only belong to one department at a time.
- Role: Select the role (e.g., Admin, Data Manager, Viewer) that defines the user’s permissions and access level.
- Reset Password: Resend a password reset link to the user if necessary.
- Delete User: Permanently remove the user from the organization.
2. Datasets Tab
Purpose:
View all datasets that the user has uploaded or has access to.
Fields and Actions:
- Dataset Name: Displays the name of the datasets the user owns or has permissions to access.
- Date Uploaded: Shows when the dataset was added.
- Access:
- Indicates whether the dataset is Public or Private.
- Modify dataset access directly from this tab if permissions allow.
Special Notes:
- Any updates to dataset permissions will also reflect in the dataset management section.
- Datasets uploaded by the user can be reassigned to other menus or users if needed.
3. Menus Tab
Purpose:
Manage the menus and dashboards accessible to the user.
Fields and Actions:
- Menu Name: Displays the list of menus assigned to the user.
- Access Level:
- Indicates if the menu is Public or Private.
- Administrators can modify menu access if necessary.
- Assigned Dashboards: View or adjust dashboards linked to each menu.
Special Notes:
- If a user no longer requires access to a menu, remove the menu from this tab.
- Changes to menu access here will immediately reflect in the user’s permissions.
4. Groups Tab
Purpose:
View and manage the groups the user belongs to.
Fields and Actions:
- Group Name: Lists all groups assigned to the user.
- Role Within Group: Specifies the user’s role in each group (e.g., Admin, Contributor, Viewer).
- Add to Group:
- Assign the user to additional groups.
- Remove the user from unnecessary groups.
Special Notes:
- Groups determine additional collaborative permissions for shared datasets and dashboards.
5. Logs Tab
Purpose:
Track the user’s activity on the platform for audit and monitoring purposes.
Fields and Actions:
- Date and Time: Shows when specific actions occurred.
- Activity Description:
- Logs activities such as dataset uploads, menu creation, or dashboard edits.
- Action Details: Provides detailed insights into the actions performed by the user.
Special Notes:
- Logs are read-only and cannot be edited.
- Use logs to troubleshoot or review the user’s platform engagement.
How can I track user activity?
Use the Logs Tab to view the user's activity, such as datasets uploaded, menus accessed, or dashboards edited.
What if a user does not activate their account?
Ensure the user receives the invitation email. Resend the invitation if necessary. Their status will remain inactive until they confirm the invitation.
Can I modify user roles or permissions after creation?
Yes, you can update a user's roles, department, and menu access from the User Info tab.